Sunday, April 29, 2012


Debora Bailey- Hampton Cove Elementary

April 29, 2012

WOW BOARD! 

When 5th grade students began their water color paintings of previously recorded observational drawings of live poinsettias, I utilized a board full of outstanding work in progress for all 5 classes to view.

We had composed our paintings using space and content as Georgia O'Keeffe had in her flower paintings 

Day one Paintings
Choosing a particular work, deciding what made it successful, questioning positive attributes of the works at the beginning of each class was a tool I used to get my students anticipating and planning what they might accomplish during their painting time.
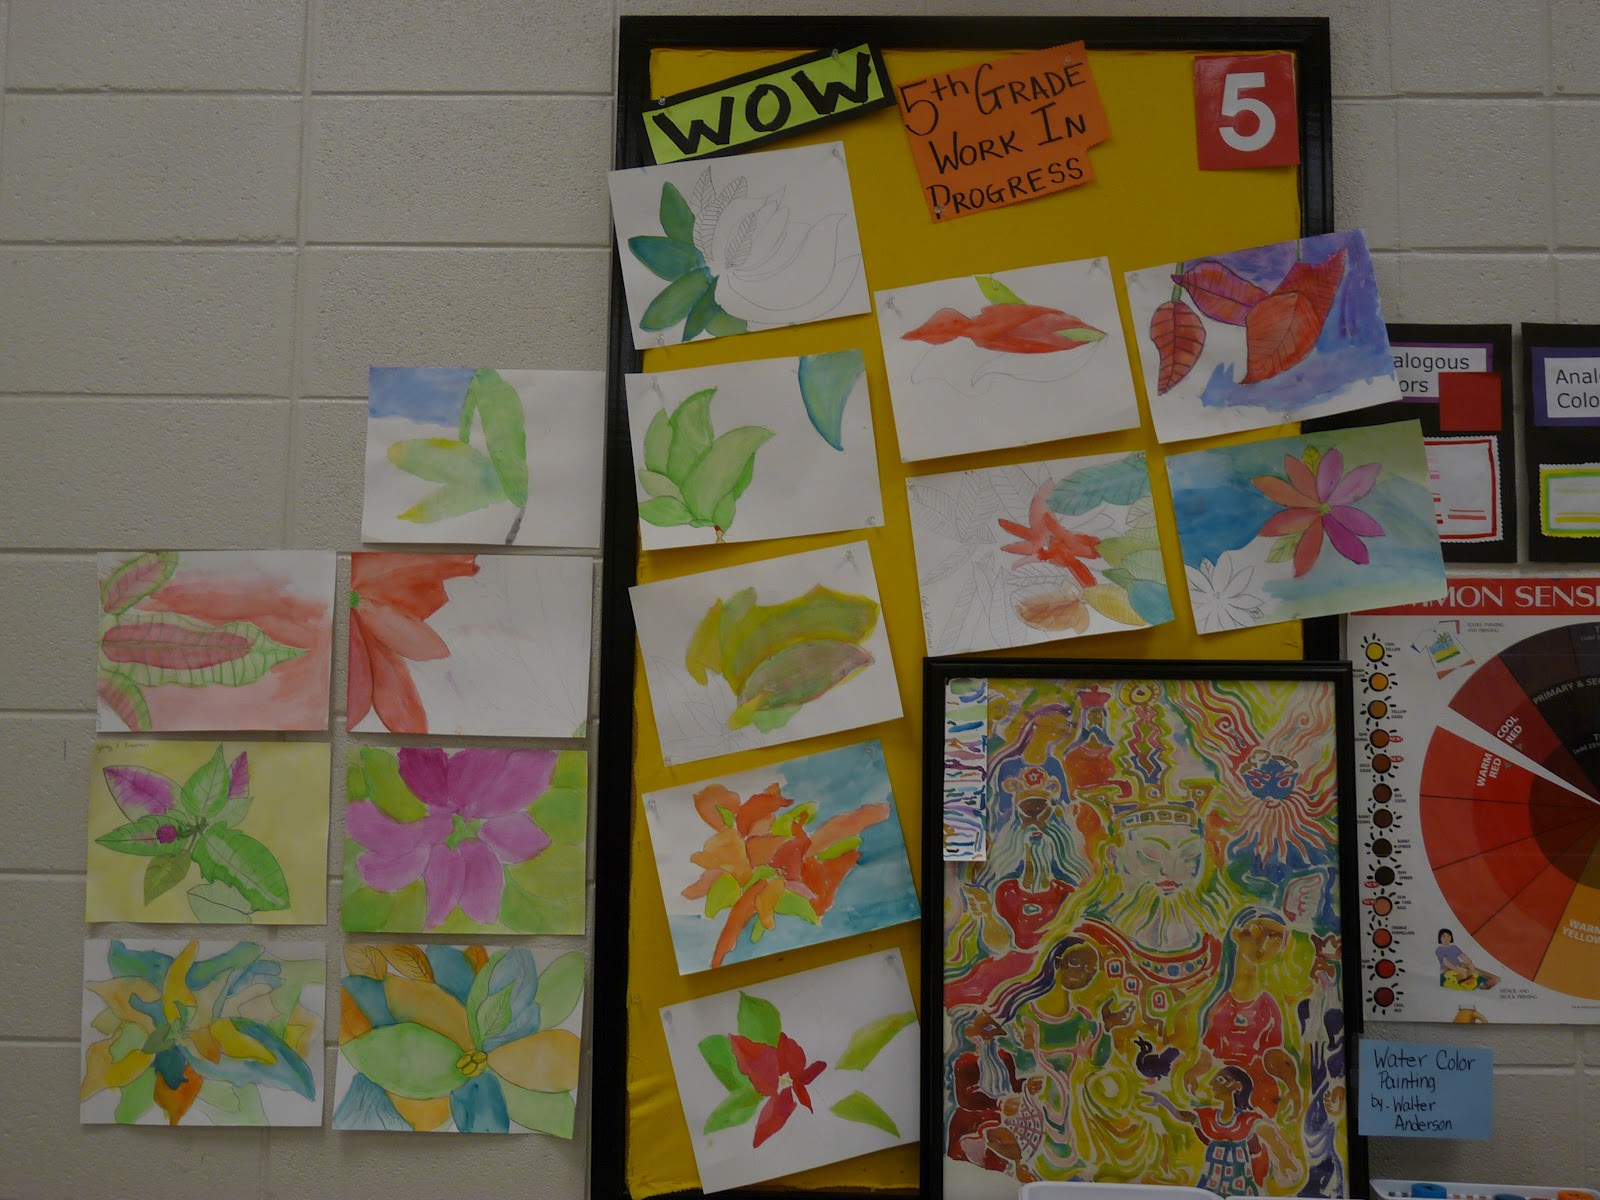
WOW BOARD FOR POINSETTIA WATER COLOR PAINTINGS

My favorite comment came at the beginning of a Day 2 painting class.  While looking at one particular picture, one young man quickly blurted out "Who did that and what size brush did they use?"  We looked at the area painted, and the values achieved and supposed perhaps a #12 as opposed to the #8.
He continued with "Well, what colors did she mix to get that color?"  Ahh, now they were thinking like an artist!   We supposed what might have been used, but I encouraged him to ask the student when next he saw her.

Formative Assessment and Student Artist's Statements

Debora Bailey Visual Arts Teacher at HamptonCove Elementray 4-29-12

Formative Assessment and Student Artist's Statements


 This year I wanted my students to take an active role in assessing their art work as they were creating and upon completion. Students were given in writing the process we would follow to make a construction paper Mola and questions to ask themselves as they were going about completing their Molas. (The questions are on the back side of the directions viewed below)

Process of  making a Mola 

Bulletin Board explaining How the Elements of Art would be used
in making our Molas
Element of Art
Element of Art


A Principal of Design

Element of Art
A bulletin board summarized how they were to use the elements of art, shape, color, space as well as the principal of pattern to create their Molas.


Then came  the day to assess what they had created.
On their own copy of the above questions, students were to form  their Artist's Statement by completing the above sentences or using their own format in their sketchbooks. They were to list 4 qualities of a REAL MOLA, and they were to tell of any problems they encountered while creating their art and how they solved them.

Some students chose to write answers in their sketchbooks.

Others began on their papers and added more of their own thoughts in their sketchbooks.


This Artist's Statement really gives the viewer insight into the symbolism found within this Mola.


Some students chose to write stories about their Molas, others focused on their inspiration for the imagery, while others wrote about their excitement in making patterns and choosing colors.  Students were given the opportunity to share with the class their written thoughts. I find that 5th graders will put into writing much more than they will communicate out loud in class.
I found a journal entry Edvard Munch made two years before he painted his famous SCREAM, describing an event and the feelings he had through out the event.  This journal entry was depicted in several paintings and woodblock prints.  I used his description as an example of a possible Artist's Statement for THE SCREAM.

Thursday, January 5, 2012

The Paint Rotation Method


Thanks to all my fellow art teachers for sharing their fabulous "Paint Rotation Method" on Tuesday's Inservice. We started working on Crabs inspired by Walter Anderson today and it worked like a charm.
If you aren't familiar with this painting method, just place ONE single paint color on each table (I used liquid watercolors). The group at the table has five minutes to paint any area with THAT ONE color. Then the group rotates to the next table carrying only their painting and their brush. We continued until each group had used all the colors. Fantastic. No mixed up paints, no spills, and no "Mrs. Cook! We need more blue!"
What a great idea. It makes life easier for the art teacher, and makes the student think seriously about how they want their artwork to look.
Thanks again Friends!
-Natalie
Blossomwood and Highlands Elementary Schools

Wednesday, January 4, 2012

Plains Indian Shields

Chapman and Weatherly Elementary

As part of our art unit on Native American Art, 4th grade students viewed old video clips, photographs and pictographs of the Plains Indians.  Using these resources, students created a design for the center of their shield and a border of geometric shapes. Once their final designs were completed with pencil, students traced over all pencils lines with permanent black marker.  Contrasting colors were added with construction paper crayons.  Hole punches were made along the outside edge of the shield after it was cut out and glued to poster board cut the same size.   Students used yarn to thread through the holes to simulate the use of buffalo hide strips.  Beads and feathers were attached at the bottom of the sheild to complete this project.  In addition to learning about the art and lifestyle of the Plains Indians, this lesson emphasizes language arts, math concepts and American history.

Beginning to create geometric pattern border

More Native American Art


Kindergarten and first grades designed a Plains Indian Tipi.    


Hey... Check it OUT!

http://www.tinytalenthsv.blogspot.com/

If you'd like to see what Blossomwood Elementary and Highlands Elementary are doing... check out Tiny Talent, my personal blog.
-Natalie

Tuesday, January 3, 2012

"Fantastic Felines by Laurel Burch" E. Seifried, Jones Valley & Monte Sano Elementaries

Elizabeth Seifried
Art Teacher JVE, MSE

Fifth Grade students learned about the artist Laurel Burch.  They listened to her biography, watched a youtube video of her interview on 60 minutes, and then viewed her artwork.  Students then designed a "Fantastic Feline" on 12X18 white paper.  They used pencils to draw, sharpies, gel markers, and paint to color.
After finishing the cats, students created an "object" that has meaning to them.  This object is then inserted between the cat's paws, as a pop-up 3-D addition to the piece.  Students have had a lot of fun thinking about what their object will be.  Some students choose a symbol, such as the earth or a heart, whereas others choose cat-themed and/or more personal objects.  We use jewel tones in this project.  The background is painted black with vibrant, silver and gold stars.

Overall this has been a fun, successful project!

Ndebele Painted Houses

We have been talking about Africa in our art classes this year.  Kindergarten and 1st grade learned about the painted houses of the Ndebele people in South Africa and created their own Ndeble houses.

This is the book I read with my K and 1st grade students before making our houses.


Here are some of my 1st graders' finished houses.
-Deena